GET STARTED
Welcome to Easier Potty Training
Loovy Instruction Manual
© 2025 gammit Tech. Patent pending. For ages 18mo+
What's in the Box?
Welcome to Easier Potty Training!
Congratulations on your Loovy! This device is designed to make potty training a fun, positive experience for your little one—while keeping things stress-free for you. Please read this guide carefully to ensure proper setup and use.
What's Inside
Before getting started, make sure you have everything you need:
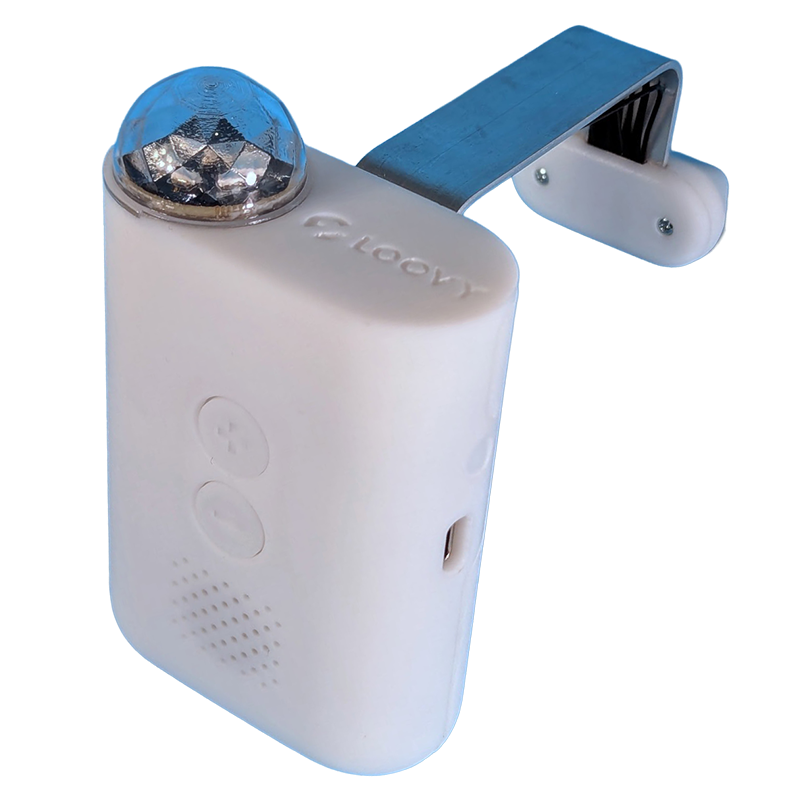
✅ Loovy Unit
✅ USB-C Charging Cable
✅ USB-C Charging Cable
Say Hello
1
Meet Your Loovy
This is the first shippable Loovy, so it isn’t perfect...yet. With your input, we’ll get there. We’re happy to have you along for the journey!
THE BIG REVEAL
2
Unboxing Your Loovy
Carefully remove all components from the box and check that you have all the included parts. Keep packaging materials in case you need to store or transport the device.
JUICE IT UP
3
Charging Your Loovy
🔋Important: Charge your Loovy fully before first use.
- Use only the included USB-C cable.
- Plug the USB-C cable into a power adapter.
- Insert the adapter into a standard wall outlet.
- Connect the USB-C cable to Loovy’s charging port (#)
LET'S GET READY TO POTTY
4
Installing Loovy on Your Toilet
Lift the toilet seat fully.
- Make sure that the seat is in an upright position and out of the way.
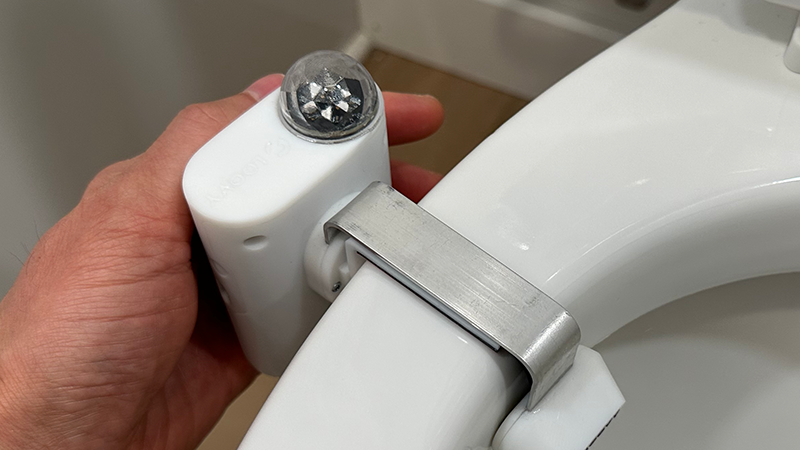
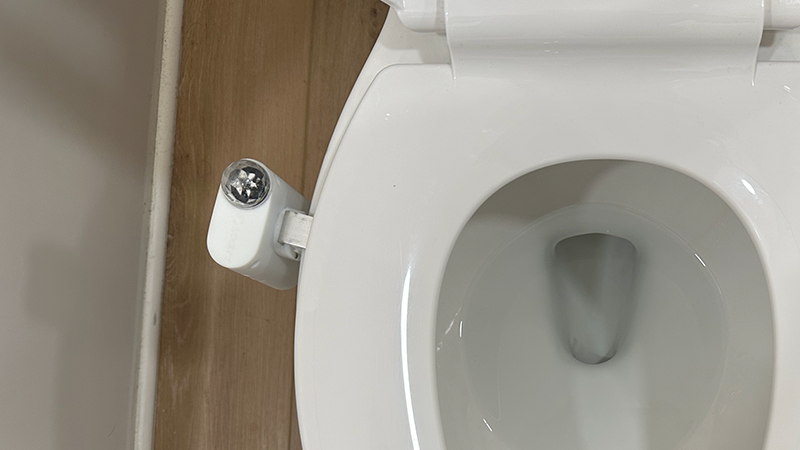
- Test fit the Loovy in the 10 o'clock position on your toilet.
- If you cannot fit the Loovy exactly at the 10 o'clock position, its okay. Just be certain that the Loovy is on the left hand side of your toilet and as close to the 10 o'clock position as possible.
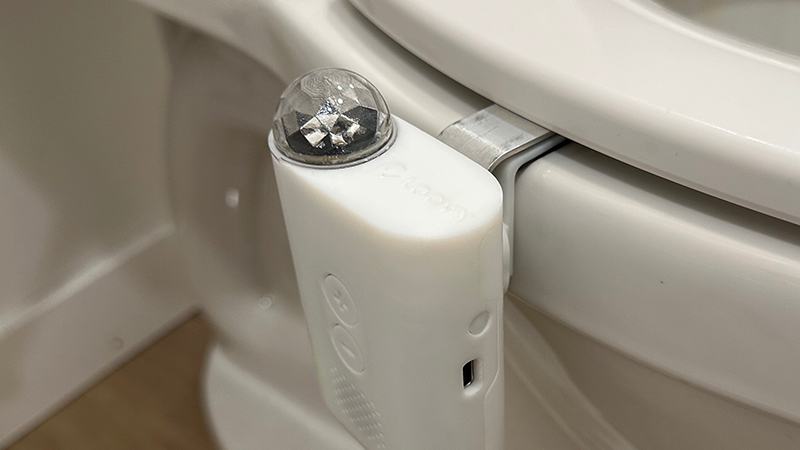
Install the Loovy toilet mount:
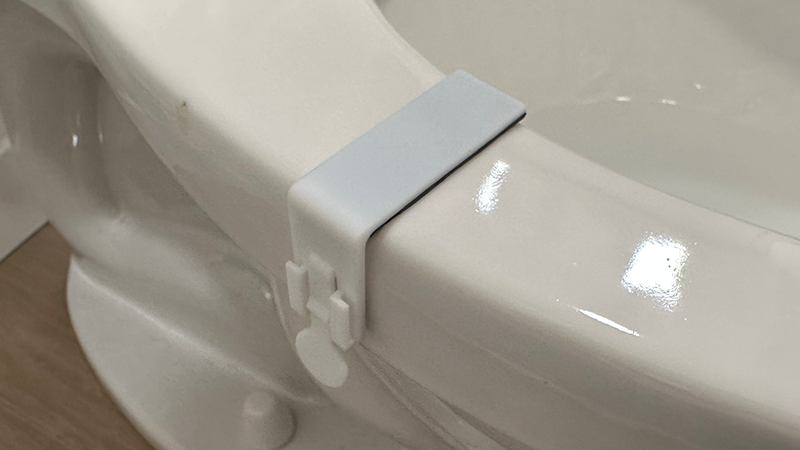
- Clean the toilet rim with one of the included alcohol wipes and allow it to dry fully.
- Remove the backing film from the adhesive strip.
- Align the inside edge of the toilet rim with the edge of the toilet mount as shown. Ensure that the clip points towards the center of the toilet bowl so that the sensor will be pointing toward the water in the bowl.
- Press down firmly for 30 seconds to activate the adhesive.
Position the Loovy
- Clip the Loovy onto the toilet mount, aligning the tabs and pressing down until a tactile click is felt.
- Gently pull up and down on Loovy to confirm that the clip is secure.
POTTY PARTY TIME
5
Using Your Loovy
Powering On
- Press the power button until Loovy turns on.
- Once the Loovy is on, you’ll see a blinking green indicator light. When the indicator light stops blinking, the Loovy is ready to go.
- The indicator light will also blink after you flush—that means the Loovy is recalibrating. When the blinking stops, the Loovy is ready to go again.
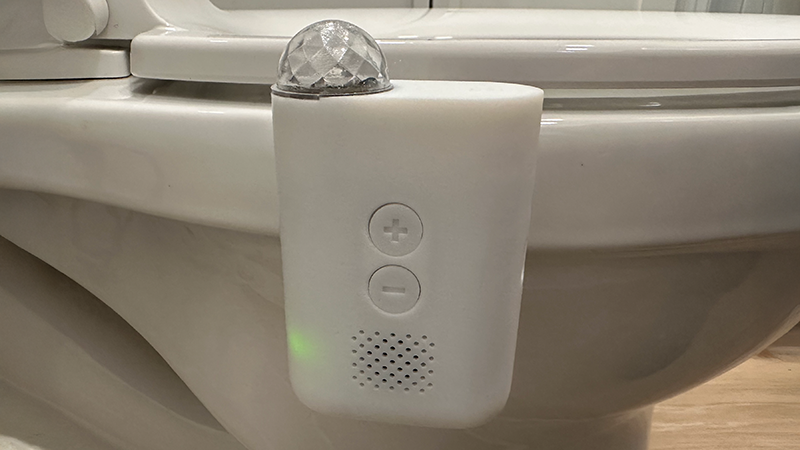
Adjusting the Volume
- Loovy has 4 volume levels: Off, 1, 2, 3, 4.
- To increase volume, press the + button
- To decrease volume, press the – button
Powering Off
- Press the power button until Loovy turns off.
QUICK RELEASE
6
Removing Loovy
- Lift the toilet seat fully to an upright position.
- Gently press the latch on the toilet mount clip towards the toilet.
- While the latch is depressed, firmly pull the Loovy straight up.
- That’s it! Clean or charge your Loovy, then press it back onto the clip until a tactile click is felt.
SQUEAKY CLEAN
7
Cleaning & Maintenance
Regular cleaning ensures optimal performance.
- Remove Loovy from the toilet (see "Removing Loovy" above).
- Wipe the body with a damp cloth or wet wipe.
- Clean the sensor & clamps: Gently scrub with a damp cloth or wet wipe.
⚠️CAUTION: Do not submerge the device in water.
Happy Potty Training!